How to install CentOS8 on Oracle Virtual BOX
How to install CentOS8 on Oracle Virtual BOX
CentOS is a Linux distribution that provides a free, community-supported computing platform functionally compatible with its upstream source, Red Hat Enterprise Linux. The new release CentOs 8 released on 2019-09-24. The new CentOS 8 comes with many new features such as BaseOS providing packages for setting up a minimal operating system, AppStream for the additional userspace applications that you can need, a new Container Tool using Podman which replaces Docker. In this tutorial, we will go through the process which will help you to install the latest release CentOS 8 through a manual installation on a Oracle Virtual Box.
Download Centos 8
The latest release Centos 8 can be downloaded from the centos official site which offers direct download. The new version size is around 6.6 GiB.Installation
We will create a virtual machine first. Choose a Name, Folder, Type and Version of the Virtual machine.Then Choose Memory and HDD size of the Virtual machine.
Now go to "storage" and choose IDE controller. Then choose "Virtual optical Disk File" and select the ISO that we have Downloaded now. Click on OK to save the settings.

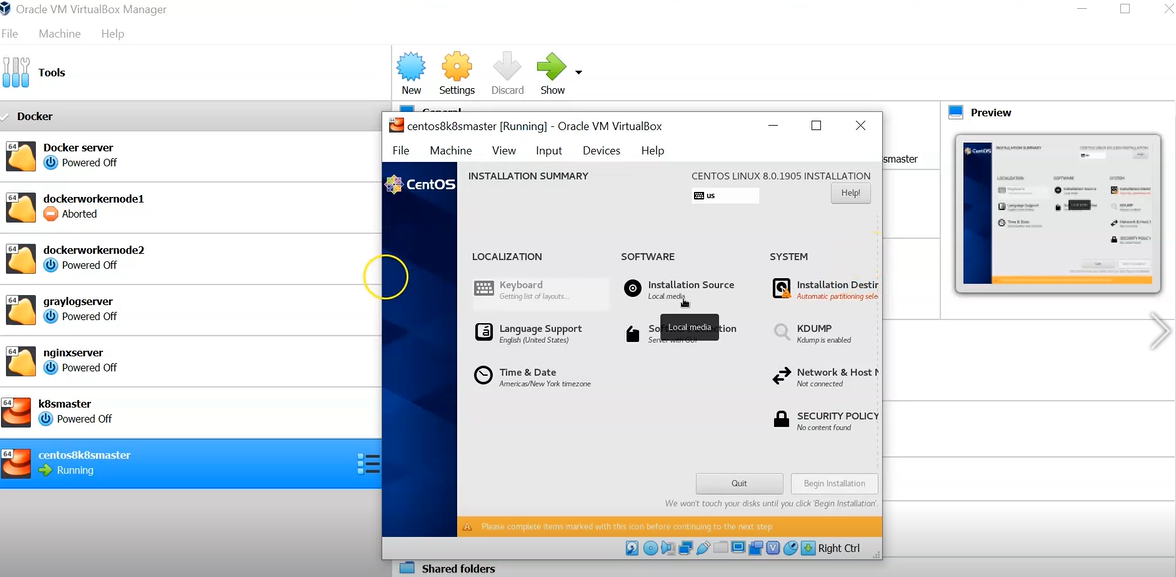
Now start the Virtual machine to boot from the ISO. Once the server booted from ISO in the Centos8 page select "Install CentOS Linux 8.0.1905" option.
Now Choose Language.
Now Select "Time & Date" to Select the Timezome. Now select Install Destination and click on "Done" to keep it "Automatic Partitioning selection".
Now Click on "Begin Installation" to start the Installation. During the installation click on the "Root Password" to set the root password. You can created another by clicking on "user creation".
Once the Installation Finishes click on reboot. After Reboot the system will Ask you to Accept the EULA.
If you have not created the User Earlier it will ask you check Licensing information and create a user. Once you are done with that task Click on "Finish Configuration"
Now do the Gnome initial setup by choosing Keyboard layout and click on next. Now you can you choose sharing location and Click on Next. Then you can add social accounts (optional) or Skip and you are ready to use your System.
For How to Setup networking and bonding using nmtui utility, Please follow this blogpost or refer my video below.


No comments